Notes
This document will be change for next version.Now is availdable for DotNetAge 2 alpha version.
System Requirements
Supported Operating Systems
- Windows 7; Windows Server 2003 R2 (32-Bit x86); Windows Server 2003 R2 x64 editions; Windows Server 2003 Service Pack 2; Windows Server 2008 R2; Windows Server 2008 Service Pack 2; Windows Vista Service Pack 2;
- Windows Vista (x86 & x64) with Service Pack 2 - all editions except Starter Edition
- Windows 7 (x86 and x64)
- Windows Server 2003 (x86 & x64) with Service Pack 2 - all editions
- Users will need to install MSXML6 if not already present
- Windows Server 2003 R2 (x86 and x64) - all editions
- Windows Server 2008 (x86 and x64) with Service Pack 2 - all editions
- Windows Server 2008 R2 (x64) - all editions
- Supported Architectures*:
- 32-Bit (x86)
- 64-Bit (x64) (WOW)
Supported DataBase
- SQLServer 2008
- SQLExpress 2008
Click here to download the SQL 2008 Express R2
Supported WebServer
- Microsoft Internet Information Server 7 (II7)
- Web Platform Installer3.0 * ( Download WebPI from : http://www.iis.net/webpi )
- Web Deployment Tool1.1 ( Download Web Delploy from : http://www.iis.net/download/WebDeploy | You can download the WebPI only WebDeploy is an extensions in WebPI.)
- Remote Admin manager for IIS7 (You can select this extension in WebPI)
- ASP.NET Development Server for VS.NET 2008
Supported .net framework
- Microsoft .net framework 4.0 or later
- ASP.NET Mvc 2
Click here to download the Microsoft .net framework 4.0
Install DotNetAge to localhost
Setup server runtime environments
1.Setup DataBase : ” Learn more about installation of SQLServer2008 from MSDN ”
2.Install Microsoft .net framework 4.0 (Download .net framework 4.0 from : http://www.microsoft.com/downloads/en/details.aspx?FamilyID=9cfb2d51-5ff4-4491-b0e5-b386f32c0992&displaylang=en )
3.Setup IIS 7
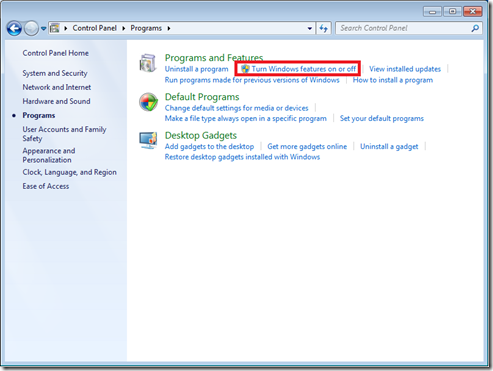
Open “Start menu->Control Panel->Programs->Turn Windows features on or off”
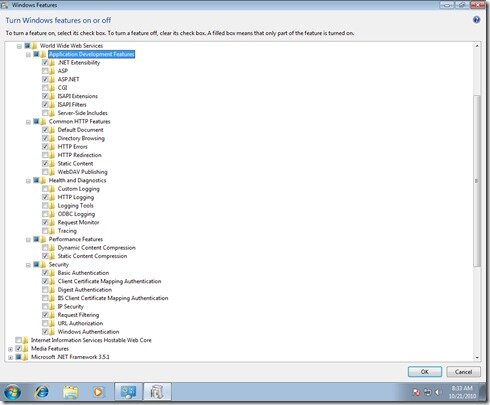
Open the windows features in below
4.Install the WebPI and select the “Web Platfrom” tab like below:
5.Import the DotNetAge runtime package for WebPI
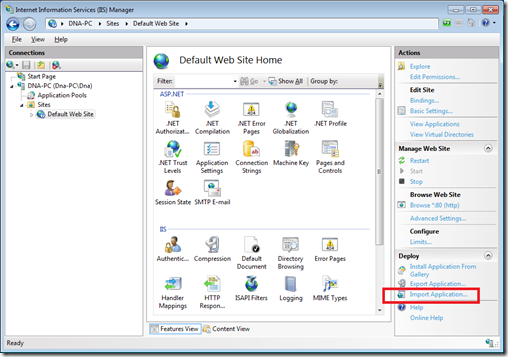
Open IIS Manager and import the DotNetAge runtime package file.
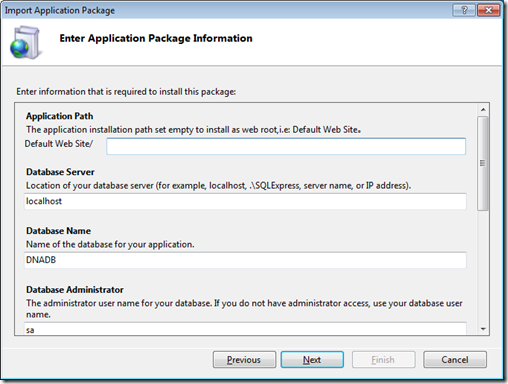
Application path – The application installation path set empty to install as web root, i.e: Default Web Site.
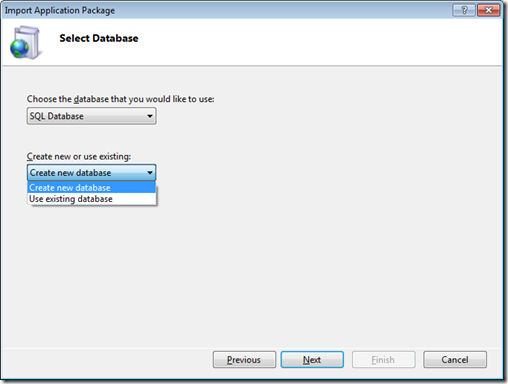
Database Server – Location of your database server (for example,localhost , .\SQLExpress,server name, or IP address).
Database name – Name of the database for your application.
Database Administrator – The Administrator user name for your database default is “sa”. WPI will use it to create the database on your server.
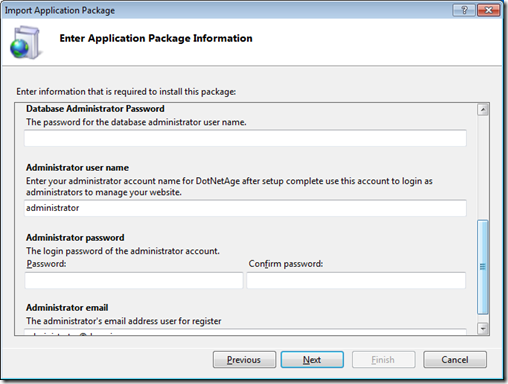
Database Administrator Password – The password for the database administrator user name.
Database User Name – The user name that DotNetAge use it to create connection string in web.config and access your database in runtime.
Database Password – The password of the database user.
Administrator user name – The Administrator account for DotNetAge , after setup complete you could use this account to login as administrators role and manage your DotNetAge website.
Administrator password – The password of Administrator account.
Administrator email – The administrator’s email address use for register.
Start DotNetAge installation
Open web browser and type the DotNetAge installation path in address bar.
Get host password
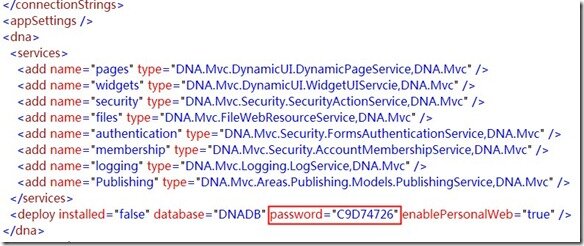
Open the DotNetAge in your web browser by default the host password is empty it generate on the installation home page first run.The DotNetAge will auto redirect to installation home page when your web site is new.Then open the web.config file of the DotNetAge installation root path.Get the password use for host logon.
Select the web site template
After database creation there are 7 kinds web site templates you can choice.
Click “Next” and Finish install.
Using the default administrator account to login the DotNetAge.
-
Average:
-
Letture(2308)
-
Permalink



Commenti (0)