Overview
This document describes how to install the DotNetAge 2.1 with zip archive.
Download the zip archive
Running DNA using WebMatrix and IISExpress
To use WebMatrix and IIS Express, extract the dotnetage.zip file to a local folder. Launch WebMatrix, and in the Quick Start screen, click
Site from Folder. Navigate to the folder where you extracted the .zip file,
select the folder named dotnetage, and then click Select Folder to open the site.
To run the site, in the WebMatrix Files workspace, select the root dotnetage folder. Click the drop-down list in the Run button and then select a browser.
Install DNA to IIS7
Before you start install DotNetAge to IIS7 please install the
IIS 7 Recommended Configuration with WebPI.
In fact the zip archive is a WebPI package so you can import the zip archive with IIS7 Manager
Setup the TopSite
When you first launch the DotNetAge site you need to setup the top site first:
Step1:Envirnoment checking
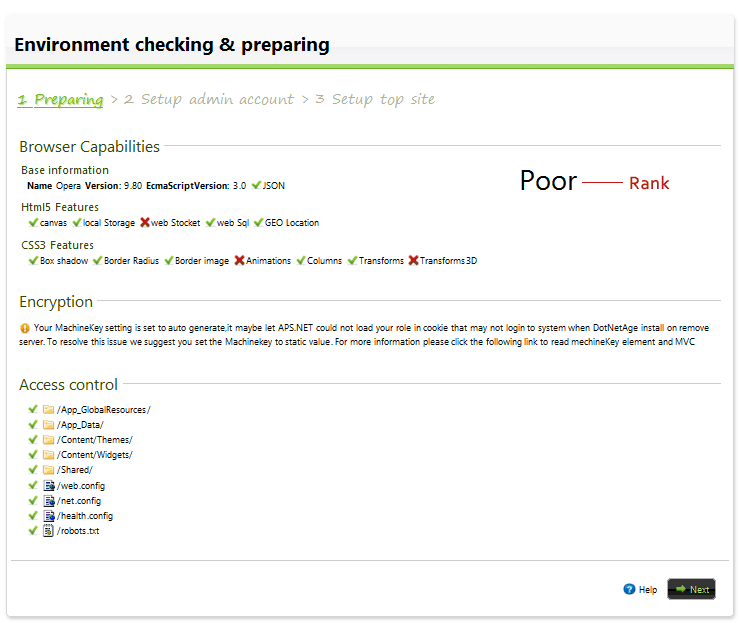
-
Browser capabilities - DotNetAge will check your browser client capabilities for HTML5 and Css3.
-
Encryption - Optional config the machinekey setting.
-
Access control - Set the acl of the necessary files and folders. The following folders and files must be has IIS_IUser modify permission:
- /App_GlobalResources
- /App_Data
- /Content/Themes
- /Content/Widgets
- /Shared
- /web.config
- /net.config
- /health.config
- /robots.txt
notes:The ACL must be set correctly that the Next button will show
Step2:Setup administrator accounts
In this steps you can create more than one administrator accounts.
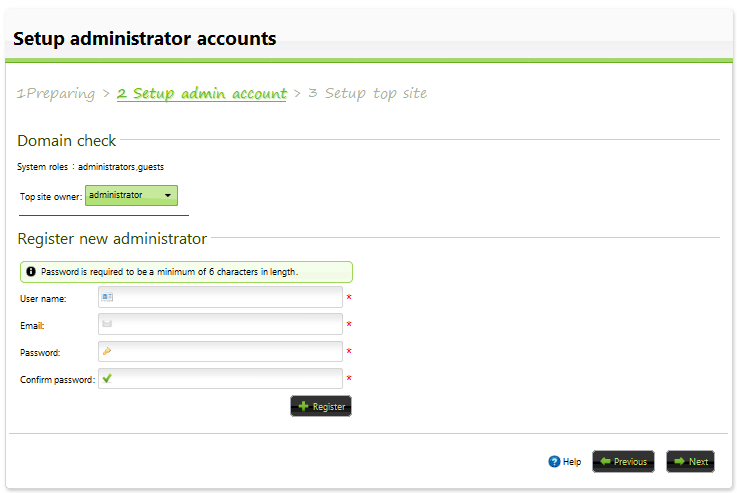
Each site must be has one owner in this screen you need to select the top site owner:
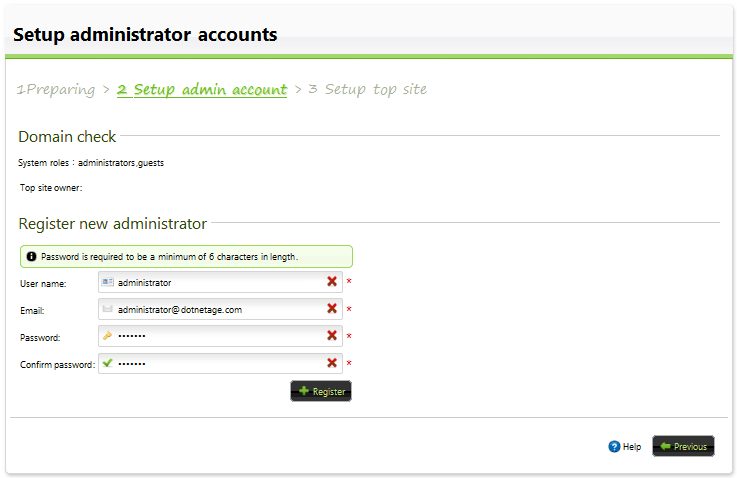
Step3: Create the top site
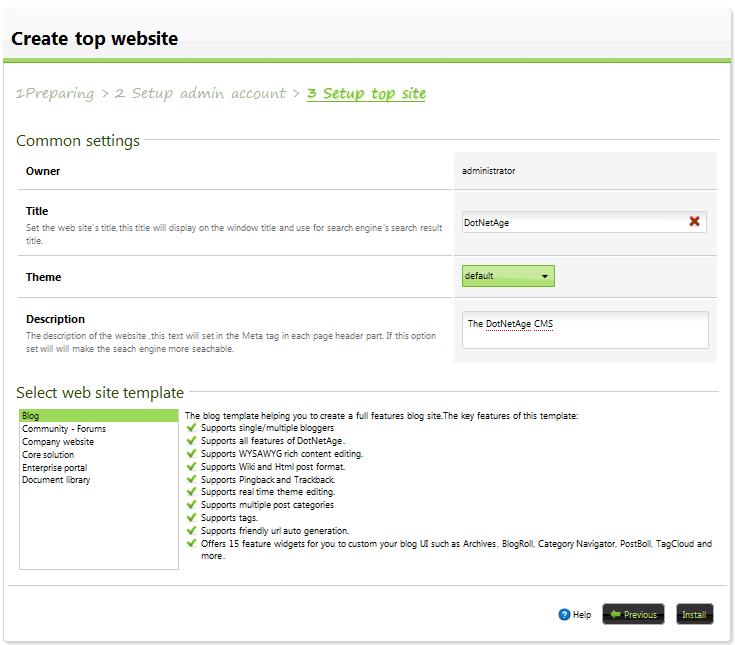
You need to provide the base information for top site to create, you can change the following setting in console after installation.
- Title - The top site title
- Theme - Select the default theme of the top site
- Description - The description text of the top site.
The top site must be create with a website template, the website templates include webpages,widgets and resources.
Step4:View log
